

How Do You Know If a Patch Is Iron On
If you've ever picked up a patch and stared at the back wondering what to do with it, you're not alone. Knowing whether a patch is iron on or sew on changes everything about how you apply it. The good news is that telling them apart is straightforward once you know what to look for.
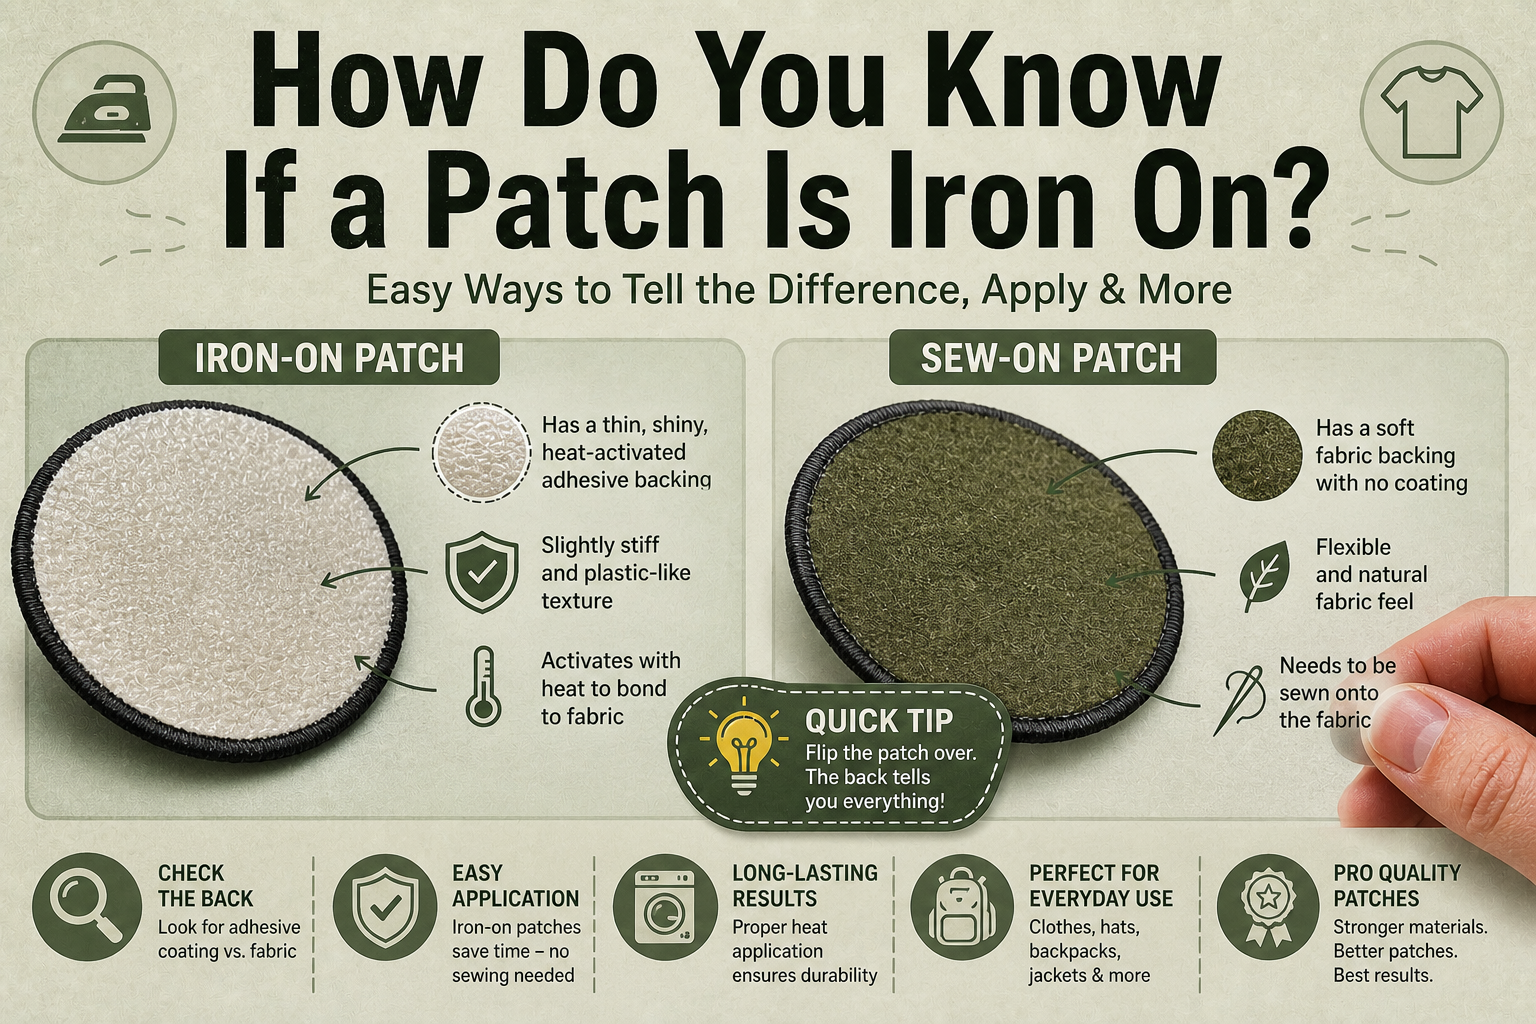
How Do You Know If a Patch Is Iron On?
Not sure if your patch is iron on or sew on? Knowing the difference is essential because it determines how you apply it. Whether you're customizing clothing or repairing fabric, identifying the patch type correctly saves time and ensures durability.
How to Tell If a Patch Is Iron On or Sew On
The easiest way to determine this is by checking the back of the patch.
- Iron-on patch: Has a thin, slightly shiny, and stiff coating
- Texture: Feels slightly plastic-like, waxy, or rough
- Color: Often light brown or off-white
- Sew-on patch: Has a soft fabric or felt backing with no coating
If the back is plain and flexible, it is not iron-on.
Do You Peel Off the Back of an Iron-On Patch?
No. Iron-on patches do not have a peel-away layer like stickers. The adhesive is built into the backing and activates with heat.
Can You Make a Patch Iron On?
Yes, you can convert a sew-on patch into an iron-on patch using fusible webbing or fabric glue tape.
- Cut the adhesive to match the patch size
- Place it between the patch and fabric
- Apply heat with an iron
This works well for jackets, bags, and jeans. For durability, stitching the edges is recommended.
How to Iron On Patches
What You Need:
- Hot iron (no steam)
- Thin cloth or pressing cloth
- Flat, hard surface
Steps:
- Pre-wash the garment and let it dry completely
- Set iron to high heat (cotton setting) and turn off steam
- Place garment on a flat surface
- Position patch adhesive side down
- Cover with a thin cloth
- Press firmly for 30–60 seconds without moving the iron
- Let cool, then flip garment and press from the back for another 30 seconds
- Allow to cool completely before handling
How Long to Iron On a Patch
- Standard patches: 30–60 seconds
- Thicker patches: up to 90 seconds
- Always press from the back for better bonding
Can Iron-On Patches Be Removed?
Yes, iron-on patches can be removed with heat.
- Reheat the patch with an iron
- Gently peel while warm
- Remove leftover adhesive using rubbing alcohol or adhesive remover
Be careful with delicate fabrics as removal may leave slight marks.
Why Pressing from Behind Matters
After applying the patch, flipping the garment and pressing from the back strengthens the bond. This ensures the adhesive fully activates and prevents edges from lifting.
Frequently Asked Questions
- How do I know if a patch is iron-on? Check for a shiny, stiff backing.
- Do you peel the backing? No, adhesive is built-in.
- Can you convert a sew-on patch? Yes, using fusible webbing.
- How long should I iron it? 30–60 seconds on each side.
- Can it be removed? Yes, by reheating and peeling carefully.
Final Thoughts
Understanding whether your patch is iron-on or sew-on makes application simple and effective. With proper technique, iron-on patches provide a strong, long-lasting bond for clothing, bags, and more. For premium quality patches with reliable adhesive backing, visit Patch Makers Hub.